Today we are going to be unboxing the Spider Farmer 27”x27”x62” grow tent, and I am really curious to see the plastic corner pieces that I have heard so much about.
This is the first tent that we have unboxed in quite a while, as the last ones that we had gotten from Spider Farmer lasted for years. While it is great that they lasted so long it also means that I have not needed to unbox one for a long time. As always when unboxing a grow tent with a knife, make sure that you do not cut too deeply into the box as you don’t want to put holes in the fabric. They have always had a layer of cardboard under the tape on the side that the tent fabric is on, but you always just want to be careful when opening these things.
First up are the plastic corners that will hold everything together, and at first glance they look pretty sturdy, and are definitely a little more bulky and reinforced than the metal ones in the past were. Next up is a bag of patches, and the manual that the tent comes with that will tell you how to assemble it. After that is a bag that holds the tent poles, and this is quite an upgrade from the nothing that the poles came in before. I will have more to say about this later, but this is a really nice addition. Next up is a protective layer of cardboard, and a sheet of stickers. Finally there is the bag that has the tent fabric itself, and under that you can see that last layer of cardboard that I had mentioned that protects the tent fabric from being cut through the other side of the box if you open it that way.
Lets get the tent poles out and I want to mention just how much I appreciate this bag. I know that a lot of folks don’t have to deal with this particular problem, but if you have ever had to pull a tent down to store it, the tent poles are a nightmare to deal with. If you wrap them up in the tent fabric, they keep sliding out the end and fall everywhere, and just make a freaking mess. With this bag, there will now be a place to keep the poles and the corners if you ever have to tear it down and you are going to be super thankful that you have this thing, so make sure to not get rid of it once you are finished assembling the tent.
As per usual there are two bags of poles in here, one of them has the poles that will form the top and bottom squares along with the two upper crossbars, and the other bag will have the two types of poles that will get combined to make the uprights. Now that the corners do not use the same click together system as the poles do, there is really only one way to assemble these which is nice for folks that are assembling a tent for the first time. Once I had those put together, it was time to get the top and bottom assembled.
As all of these poles and corners are the exact same, just grab four of each and start assembling. While there are some valid concerns that I can see about these plastic corner pieces, I actually kind of like them now that I am actually assembling a tent that has them. The corners are nicely rounded, so there is going to be a much lower chance of someone ripping the corner of their tent as they assemble it. They are also even easier to use than the metal ones, if such a thing is possible. You just slide the pole into the corner, and then tighten down the screw end to secure it in. You don’t have to worry about not aligning them quite right, as the pole can still twist when it is in there. I will have to see how they hold up over time, but at least initially it doesn’t feel like a bad change.
Once you have both the top and bottom square put together, it is time to connect them with the upright poles that we already put together. This part is even easier, just push the poles into each of the corners and tighten them up with same screwing mechanism that we put them together with. Once those are together it is time to put the top square on there, and the hardest part is lining up the first one on the backside if you decide to try to do those ones first like I did. Tighten them all up just like everything else that we have done, and it is time to put the fabric on the framework.
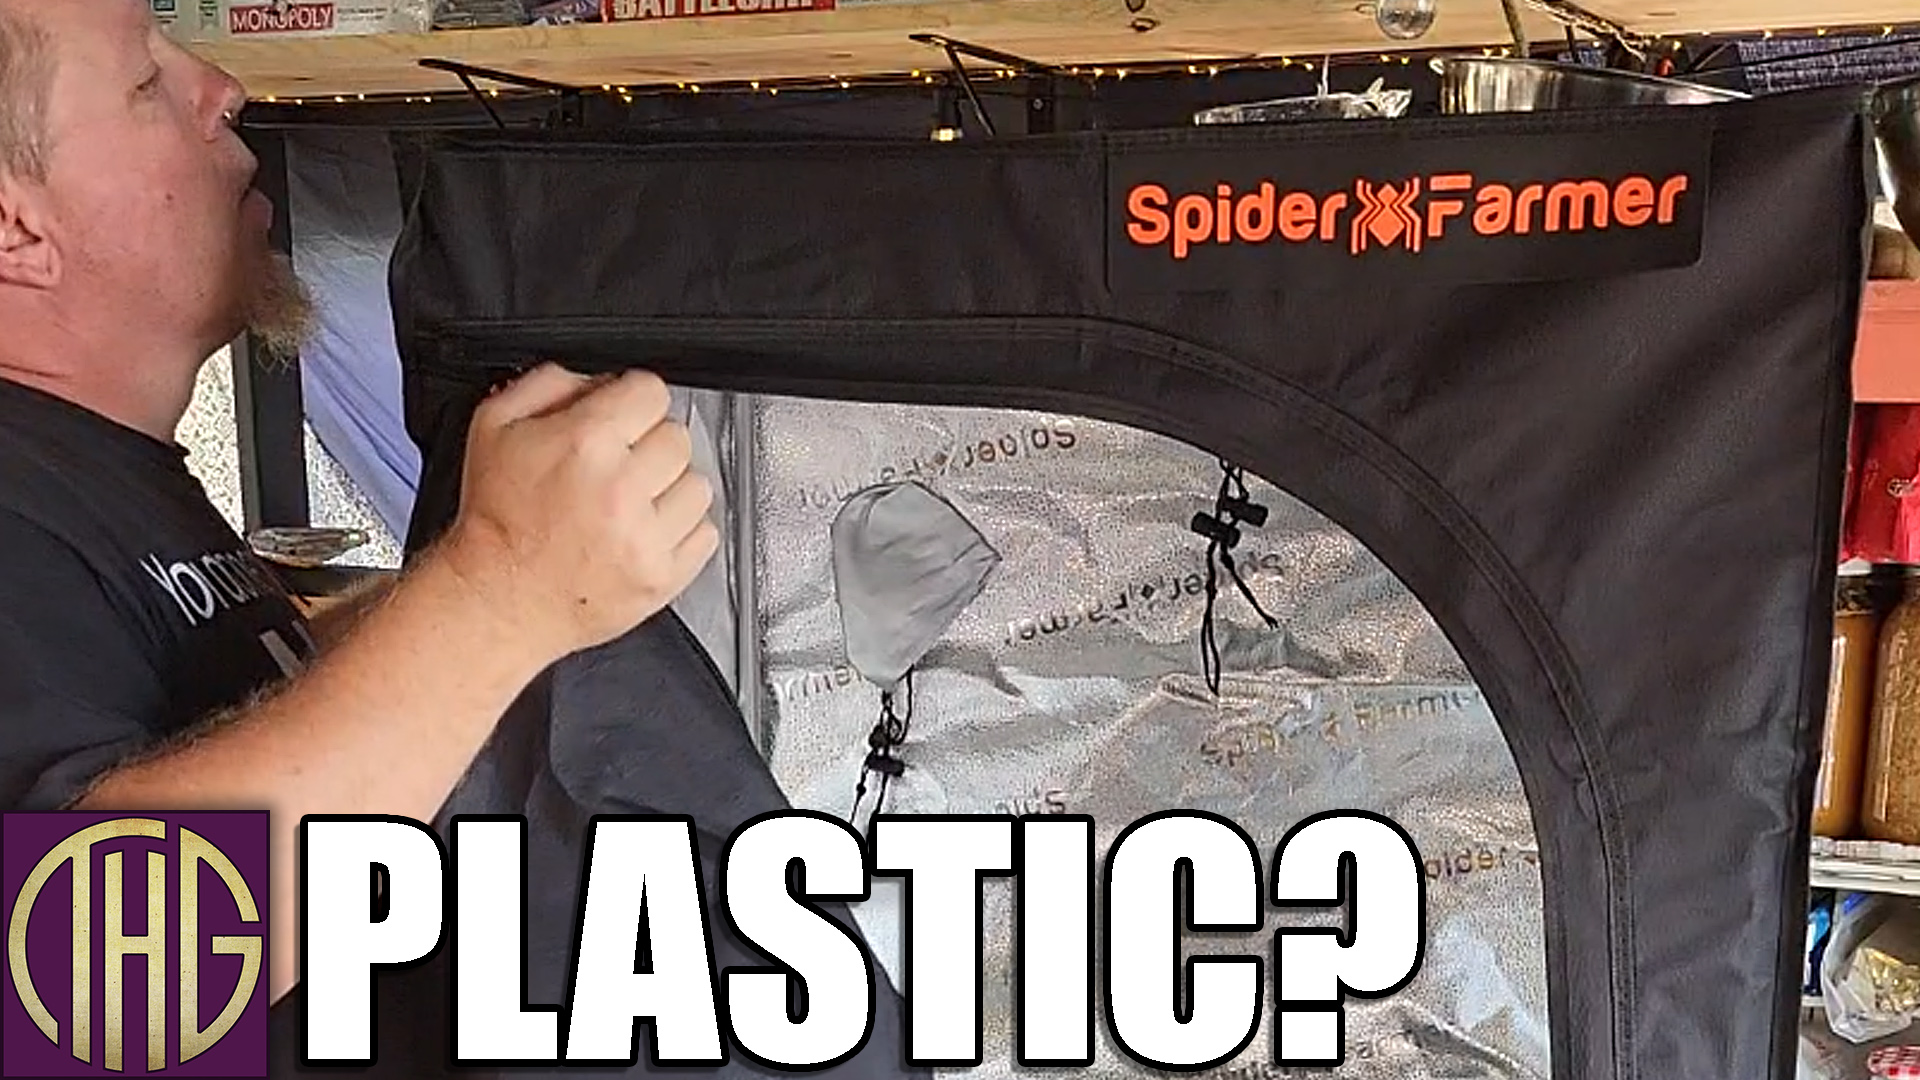
The first thing you need to do it get it unrolled and unfolded, then find the end of the zipper. Open it up all of the way around, and figure out which part of it is the top, you can tell that because of the spider farmer logo that will be in the upper right above the front of the door. Place the entire thing over the top, pulling it from the back of the tent towards the front, you are pretty much pulling the framework in thru the tent door. Once you have all four of the corners pulled down nice and snug over the framework, it is time to get the bottom under the framework without ripping it.
Juist kidding, what we are going to actually do is to start zipping the door closed, until it gets down towards the bottom of the framework. Once that it there, just flip the entire tent over onto its top. This is going to make it a lot easier to finish fitting the fabric over the framework. Once it is all on there, run both of the zippers back around the way we just came, so that they end up back at the top of the door. There it is, a fully assembled tent. This version has the same excellent zipper and zipper cover flap that the previous ones have had, with a vent opening in the door that you can Velcro up if you want to leave it open.
They have kept the door hook on the left side of the tent so that you can hold the door open while you are working on the plants, which I am really happy to see that they have kept in. There is nothing worse than fighting the door flopping in your face when you are in there thinning the plants out. Looking inside the tent, you can see that I haven’t installed the bottom tray yet so that we can see the corner pieces. There are three of the rectangular vents at the bottom here that you can open up by removing the Velcro door flaps on the outside of the tent, and on the back wall there is a three-inch port for wires.
As we look up towards the top you can see just how reflective the sides are which is great for light penetration, and then we get to the ports up there. On the back wall there is another three-inch port for wires, with a single eight-inch port in the back right of the top of the tent. There are two six-inch ports, one on the left wall and another on the right wall, which should have you covered to get wires and ducts into and out of the tent.
By far the biggest question I had going into this unboxing was the new plastic corners. When I first heard about these showing up I was surprised and disappointed, but after putting this tent together I think that it is going to be fine. They are very strong, and they have made the framework even easier to assemble. They are also not going to scrape the paint off of the connectors or bars when you are assembling them, which means that you are not going to be seeing rust on the scrapes. If you don’t like the plastic, I totally get it, but I think that in this case they are actually going to be an improvement over the previous metal ones, but that is just my opinion. If you have any questions about this thing that I still haven’t answered, leave them in the comments down below and I will get them answered for you.
A big thank you to Spider Farmer for sending over this 27”x27”x 62” grow tent for us to take a look at. If you want to check out their gear for yourself, make sure to click on the links to their website in the video description down below and use the discount code GEEKS at checkout to get eight percent off your entire order.
Spider Farmer 27″x27″x62″ grow tent: https://www.spider-farmer.com/products/sf-2-x2-indoor-grow-tent-hydroponic-home-plant-reflective-aluminum-oxford-cloth/
USA(worldwide): https://spider-farmer.com
Canada: https://spiderfarmer.ca
Europe: https://spiderfarmer.eu
UK: https://spiderfarmer.co.uk
Australia: https://spiderfarmer.com.au
Thailand: https://spiderfarmer-th.com
Use code GEEKS at checkout to get 8% off your entire order!!
Our Links: Website: https://www.thehippiegeeks.com
Amazon Wishlist: https://www.thehippiegeeks.com/gifts
Instagram: https://www.thehippiegeeks.com/instagram
Twitter: https://www.thehippiegeeks.com/twitter
Contact For Business Inquiries: [email protected]